
How to clean out fuel tank: A Safe, Easy Guide
- Misfuelled Car Fixer

- Nov 27, 2025
- 17 min read
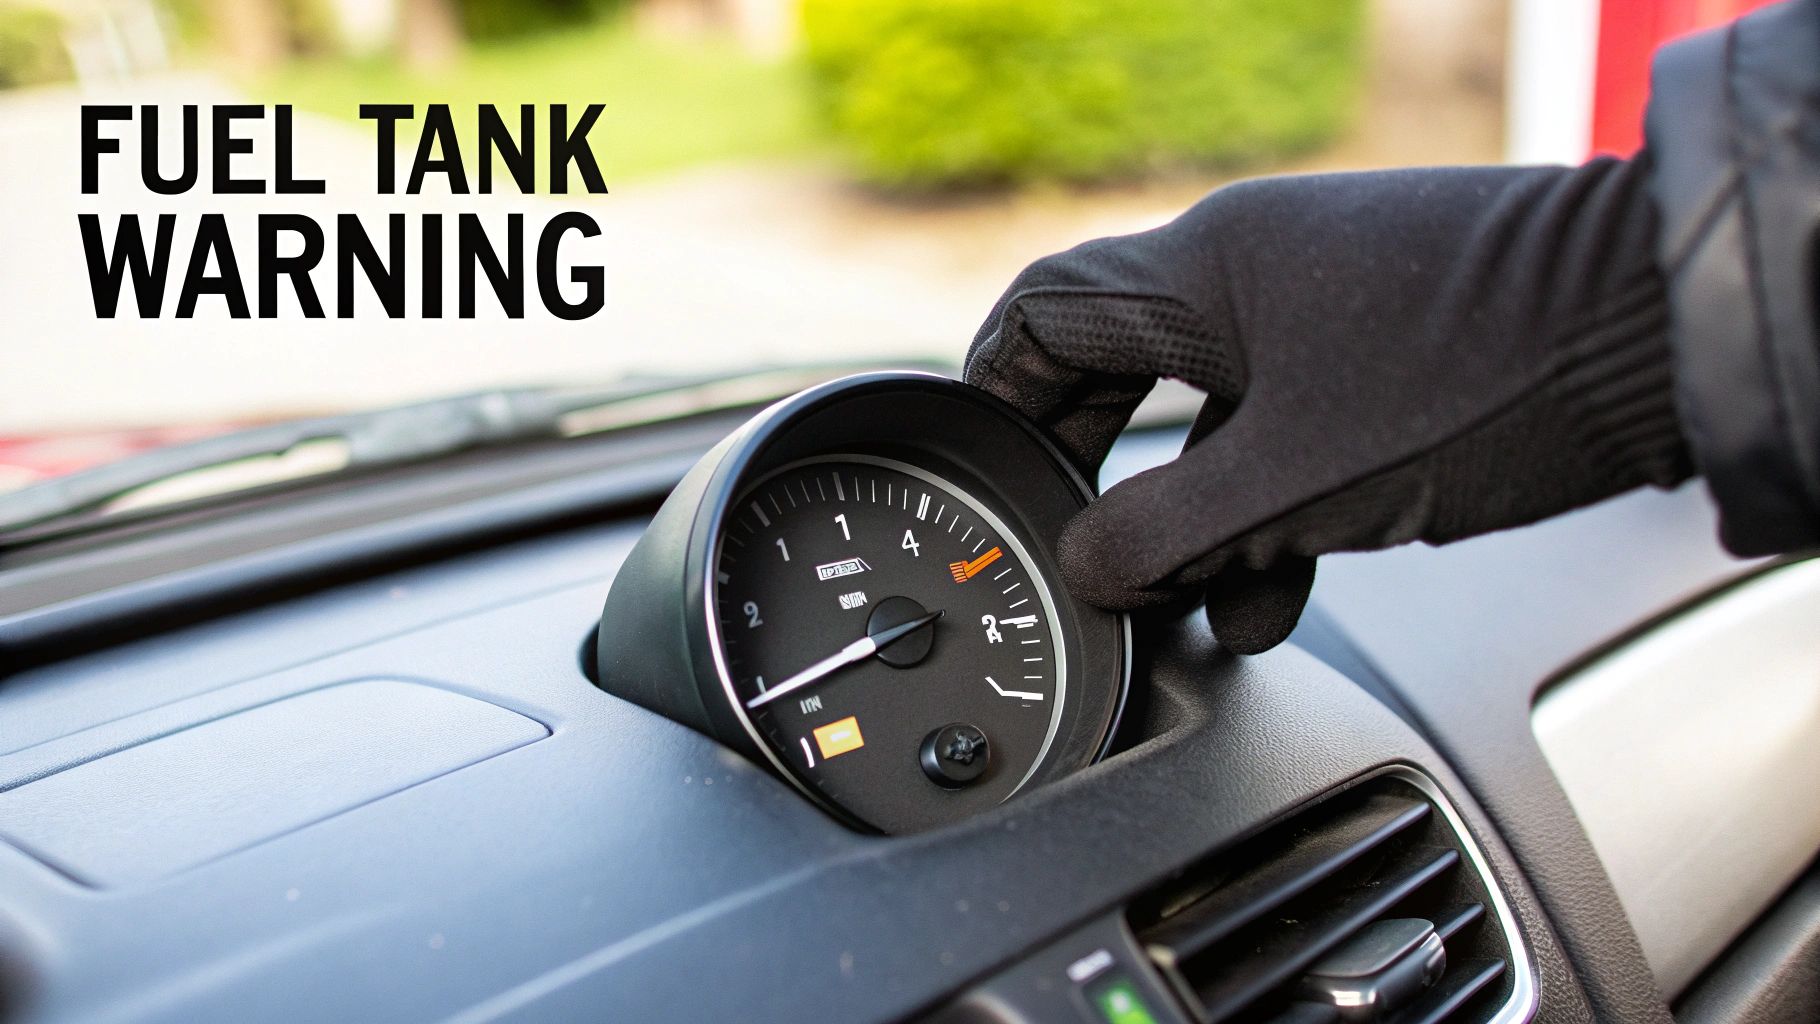
It usually starts with a feeling. Your car just feels off. The engine might sputter, it could struggle to get up to speed, or maybe it refuses to start on a cold Suffolk morning. These are classic signs that something's wrong in your fuel tank – contaminants like water, rust, or sludge could be messing with your fuel delivery.
How to Spot a Contaminated Fuel Tank
Before you even think about getting the tools out, you need to be sure the fuel tank is actually the problem. Getting this wrong can mean a lot of messy, unnecessary work. Your car has its own way of telling you something's up; you just have to know what to listen and feel for.
The symptoms can be subtle at first, but they almost always get worse as more gunk gets pulled into the fuel system.
Picture this: you're on the A14 heading out of Ipswich, you put your foot down to overtake, and instead of that smooth burst of power, your car hesitates, jerks, or feels like it's holding back. That's a textbook sign of inconsistent fuel flow, very likely because debris is starting to clog up the fuel filter or injectors.
Common Performance Problems
The most glaring clues are all about how your car drives. Contaminated fuel just doesn't burn properly, and that leads to a noticeable drop in power and responsiveness. Keep an eye out for these issues:
Engine Sputtering or Misfiring: Feels like the engine is skipping a beat. It can happen at any speed and is often caused by contaminants interrupting the clean, steady spray of fuel into the engine.
Poor Acceleration: If your car feels sluggish or struggles to get up to speed, dirty fuel could be starving the engine of the energy it needs to perform.
Difficulty Starting: Water or debris in the fuel lines makes it tough for the engine to fire up, especially after it's been parked overnight.
Rough Idling: When you're stopped at the lights, does the engine vibrate or sound uneven? That's a good sign the fuel-to-air mixture has been compromised.
Subtle Warning Signs to Watch For
It's not always about big, dramatic performance issues. Sometimes the signs are a bit more subtle, and catching them early can save you from a much bigger headache down the line.
Water is one of the most common culprits, often building up from condensation, especially in diesel tanks. If you want to dive deeper, you can explore the specific signs and causes of water in diesel fuel to see if that's what you're dealing with.
Another clue? A sudden, unexplained drop in fuel efficiency. If you're suddenly stopping at the petrol station in Bury St Edmunds more often, but your driving habits haven't changed, your engine is probably working overtime to compensate for poor fuel quality.
Pro Tip: Trust your nose. A foul or unusual smell coming from the exhaust is a serious red flag. When contaminants burn with the fuel, they can produce odours—from sulphur to something more acrid—that are definitely not normal.
Getting Your Toolkit Ready for a Fuel Tank Clean-Out
Trying to clean a fuel tank without the right gear is more than just messy—it’s downright dangerous. We're dealing with highly flammable fuel and fumes, so a safety-first mindset is absolutely non-negotiable. Getting all your kit together before you start means you can work smoothly and, most importantly, safely.
Think of yourself as a car surgeon for a moment. You wouldn't go into an operation with the wrong instruments, and the same logic applies here. Every single item on this list has a vital job to do, either for the car's sake or yours. Cutting corners, like trying to use a bit of old garden hose instead of a proper siphon, is just asking for a dangerous spill or, even worse, a mouthful of fuel.
Your Safety Gear: Don't Even Start Without It
Before you even think about picking up a spanner, let's talk about personal protective equipment (PPE). Fuel is nasty stuff—it'll irritate your skin, it can do serious damage to your eyes, and breathing in the fumes is a big no-no.
Chemical-Resistant Gloves: Forget standard latex gloves; petrol or diesel will eat right through them. You need proper nitrile or neoprene gloves designed to handle petroleum products.
Safety Goggles: A splash of fuel in the eye is agony and can cause lasting damage. Go for a pair of wrap-around goggles that seal properly against your face.
Respirator Mask: Even in a garage with the door wide open, fumes can build up fast. A simple dust mask is useless here. You need a respirator fitted with cartridges specifically rated for organic vapours.
Your safety is the top priority. If you start to feel dizzy or sick at any point, stop what you're doing immediately and get into fresh air. Fuel vapour can overwhelm you very quickly in an enclosed space.
The Right Tools for the Job
Once you're kitted out with your safety gear, it's time to gather the tools for draining and cleaning the tank. The name of the game is minimising any risk of sparks or further contamination.
Something many people don't consider is their choice of hand tools. Using steel spanners or scrapers near an open fuel tank is a huge risk—if you drop one, it could create a spark. As professionals, we often use tools made from brass or bronze because they're non-sparking. While you probably don't have those lying around, it just underlines how careful you need to be.
Here's a checklist of the essentials:
Approved Fuel Siphon Pump: This is the only safe way to drain a tank. Get a proper manual or electric pump designed specifically for fuel transfer.
Certified Jerry Cans: You'll need properly sealed, certified containers to hold the contaminated fuel. Make sure you have enough to hold the entire contents of your tank.
Lint-Free Cloths: A standard rag will leave behind tiny fibres that can clog your fuel filter in a heartbeat. Stick to microfibre cloths for wiping anything down.
Wrenches and Sockets: You'll need these to disconnect fuel lines and maybe remove an access panel or the fuel tank sending unit.
A Bright Torch: Essential for having a good look inside the tank for any stubborn sludge or rust once it’s empty.
Interestingly, the UK has been serious about fuel storage safety for a very long time. The Petroleum (Consolidation) Act 1928, which came about after an inquiry started by Winston Churchill, was a landmark law. It set the first real safety standards for handling fuel, creating a foundation that protects us to this day. You can read more about the history of these safety regulations for fuel storage on Wikipedia.
Lastly, it’s a smart move to have a quality fuel system cleaner ready. After the tank is clean and refilled with fresh fuel, adding a bottle of cleaner will help shift any lingering deposits in the fuel lines and injectors. Our guide explains in more detail what fuel additives are and how they work to keep your engine running sweetly.
A Hands-On Guide to Draining and Cleaning Your Fuel Tank
Right, let’s get stuck into the job itself—getting that fuel tank properly cleaned out. This isn't a quick five-minute task; it demands patience, a bit of methodical thinking, and a serious focus on safety. Think of it less like a brute-force job and more like careful surgery on one of your car’s most vital organs.
We'll go through the whole process, from setting up a safe workspace to the final scrub-down. Whether you've just realised you’ve put the wrong fuel in or you suspect contamination has been brewing for a while, these steps will see you through.
Setting the Stage for a Safe Job
Before you even think about touching a spanner, your workspace and the car need to be prepped. Fuel vapours are no joke—they're incredibly flammable, and a single stray spark is all it takes for things to go badly wrong. Your absolute top priority is creating a safe, controlled environment.
Get Some Air: Never, ever try this in a sealed garage. You need to be working outdoors, or at the very least, in a garage with every door wide open to let the fumes escape.
Kill the Power: The very first thing you do is disconnect the negative terminal on your car battery. This simple step kills the risk of sparks from any of the car's electrical systems.
No Sparks, No Flames: It sounds obvious, but it’s the most important rule. Make sure there are no naked flames, cigarettes, grinders, or anything else that could create a spark anywhere near your work area.
With those crucial checks done, you’re ready to get the old fuel out. This is where your siphon pump and approved jerry cans earn their keep.
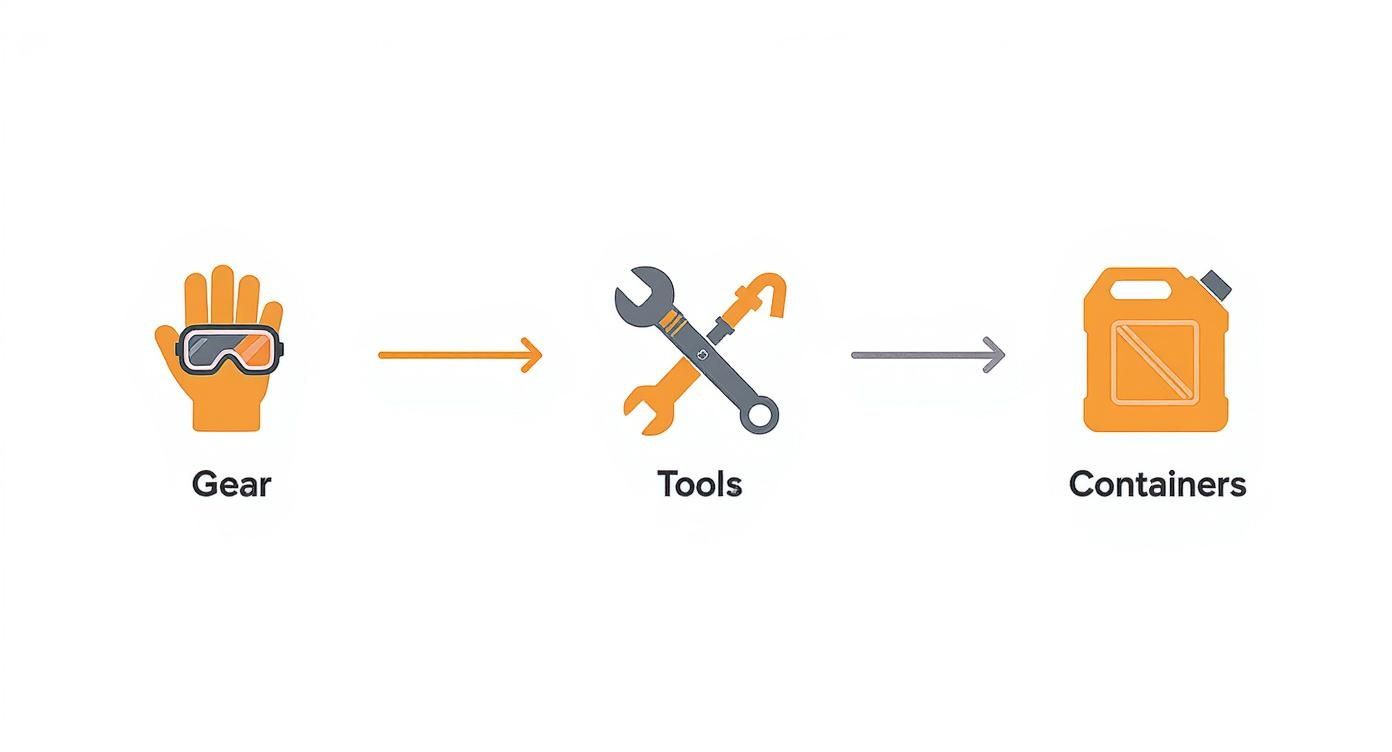
This just breaks down the essentials: you need the right gear to protect yourself, the right tools for the job, and the right containers to handle the fuel safely.
Draining the Contaminated Fuel
The first real task is to get as much of that contaminated fuel out as possible. A good quality fuel siphon pump is a must-have here. Seriously, don’t even think about using your mouth and a bit of hose—it’s incredibly dangerous.
Feed the siphon's intake hose down the fuel filler neck until you feel it hit the bottom of the tank. Pop the other end securely into an approved jerry can, making sure the can is sitting on lower ground than the tank itself to give gravity a helping hand. Start pumping to get the flow going, then let the siphon do its work. Be prepared with a few jerry cans; you'll likely need them.
Even when the flow trickles to a stop, you’ll still have a small amount of fuel and all the heavy gunk left at the bottom. The next job is to get inside the tank to deal with that stubborn residue.
Getting Inside for a Proper Look
On most modern cars, you can get to the fuel pump and sender unit from inside the vehicle, typically hiding under the back seat. You might need to pull up a bit of carpet or remove a small metal or plastic cover plate to get at it.
Once you’ve found the access port, the process is straightforward:
Disconnect everything carefully—all the electrical plugs and fuel lines attached to the top of the unit. Keep some old rags handy to mop up any little spills.
Undo the locking ring that holds the whole assembly in place. These can be on there pretty tight, so you might need a special tool. A gentle tap with a brass drift and a hammer also works (use brass, not steel, to avoid making sparks!).
Gently lift the fuel pump and sender assembly straight out of the tank. Watch out for the float arm, as it’s easily bent.
With the pump out of the way, you can grab your torch and have a proper look inside. What you see will tell you a lot. You’re on the lookout for a thick, dark layer of sludge, rust flakes, or any water that’s settled at the bottom.
Have a quick look at the fuel pump’s filter sock while it’s out. If it’s black and clogged with muck, that’s all the proof you need that the tank desperately needs cleaning.
The Clean-Out Itself
Now for the mucky part. Grab your lint-free cloths and start mopping up the last of the fuel and sludge from the bottom of the tank. The goal is to get as much of the loose gunk out as you can first.
For the stubborn grime that’s clinging to the walls and floor, a long-handled brush with soft bristles is your best friend. Gently scrub the surfaces to break loose any dried-on sediment. Sometimes, a dedicated fuel tank cleaning solution can make a real difference, but always follow the manufacturer's instructions to the letter. Never, ever use water to rinse a fuel tank; you’d just be reintroducing the number one enemy of any fuel system.
The exact method might change depending on the tank. Official UK government guidelines, for example, note that glass-reinforced plastic petrol tanks just need to be wiped until they are clean and dry. In contrast, a diesel tank with heavy contamination might require a more aggressive chemical wash to break down all that sludge. You can read up on the official procedures in the government's guide to cleaning fuel tanks.
The Big Difference: What If You Ran the Engine?
If you drove the car, even for a few minutes, with contaminated fuel, cleaning the tank is only half the battle. The bad fuel has already been sucked through the entire system. Just putting fresh fuel in a clean tank won’t cut it.
If the engine has been run, you’ve got a few more jobs on your list:
New Fuel Filter: The old fuel filter is now toast. It’s completely saturated with contaminants and must be replaced.
Flush the Fuel Lines: The pipes running from the tank to the engine are full of the bad stuff. You need to disconnect the line at the engine and use a small amount of clean fuel to push all the old, dirty fuel out into a waste container.
Clean the Injectors: Your fuel injectors are probably clogged with tiny bits of debris. Adding a high-quality, in-tank injector cleaner to your first tank of fresh fuel is vital to help dissolve these deposits.
Skipping these steps is a false economy. All the gunk still sitting in your lines and filter will instantly contaminate your fresh fuel, and you’ll be right back where you started. Taking the extra time now ensures the whole system is spotless, giving your engine the clean start it deserves. Once you've reassembled everything, you're ready for the final, crucial phase: getting rid of the old fuel responsibly.
Handling a Misfuelling Nightmare: Petrol in Diesel
It’s a moment of pure panic. You’re at the pump, your mind is elsewhere, and you’ve just put the wrong fuel in your car. Putting petrol in a diesel engine, or worse, AdBlue into the fuel tank, is a surprisingly common mistake. But make no mistake, it's a serious one that needs immediate, correct action.
The single most important thing to remember is this: do not start the engine. Seriously. Don’t even turn the key to power up the dashboard or listen to the radio. The second you do, the fuel pump will whir into life and start pulling the wrong fuel into the very heart of your vehicle's system.
What Really Happens When Petrol Meets a Diesel Engine
Think of diesel as more than just fuel; it’s also a lubricant that keeps the high-pressure fuel pump and injectors running smoothly. Petrol, in complete contrast, is a solvent. It cleans things.
When petrol enters the diesel system, it immediately begins to strip away that essential lubricating film. This creates intense friction between delicate metal components, which can chew up the insides of the fuel pump in minutes. The result is a shower of tiny metal particles, or ‘swarf’. If the engine is running, this swarf is blasted at immense pressure through the entire system, destroying injectors and causing damage that can easily run into the thousands.
The only safe way forward is a professional fuel drain. Don't be tempted to just top up with the correct fuel and hope for the best—it simply won't dilute the petrol enough to prevent catastrophic damage.
The AdBlue Contamination Problem
Pouring AdBlue into your main diesel tank is another increasingly common disaster, and it's just as destructive as petrol. AdBlue is a mixture of urea and de-ionised water, and while it’s vital for your exhaust system, it’s also highly corrosive to many of the seals, plastics, and metal alloys used in your fuel system.
Once it’s in the tank, AdBlue gets to work corroding components like the fuel pump and sender unit. Even worse, as it evaporates, it forms hard white crystals. These crystals will clog everything they touch—the fuel filter, the injectors, the entire fuel rail. What starts as a simple mistake can quickly lead to a repair bill that eclipses the cost of a fuel drain many times over.
Your Immediate Action Plan
If you’ve just realised you’ve misfuelled, take a breath. What you do in the next few minutes can save you a world of trouble and expense.
Engine Off: We can't stress this enough. Leave it off.
Tell the Petrol Station Staff: They need to shut down the pump you used to stop anyone else from making the same error.
Move the Car Safely: If you can, pop it in neutral and push it to a safe spot. If you’re blocking a pump, ask for help or for some cones to be put out.
Call in the Experts: This isn't a job for your local garage or a breakdown service. You need a specialist mobile fuel drain service. A company like Misfuelled Car Fixer has the right equipment and expertise to come to you, whether you're stuck in Ipswich, Bury St Edmunds, or on the hard shoulder of the A12.
The Specialist Process for Fixing a Misfuel
Correcting a misfuel is a world away from simply cleaning a sludgy old tank. A specialist technician follows a precise, multi-stage process to ensure every last trace of the contaminant is gone.
Total Fuel Tank Drain: The first job is to safely pump out the entire contents of the fuel tank using certified, explosion-proof equipment.
A Full System Flush: This is the critical step. Once the tank is empty, a small amount of the correct, clean fuel is used to flush the fuel lines, pump, and filter housing. This pushes out any contamination that has already been pulled from the tank. This flushed fuel is then drained away too.
Component Check: The technician will often inspect the fuel filter. In many cases, especially with AdBlue, it will need to be replaced.
Refill and Safe Restart: Finally, a fresh supply of the correct fuel is added to the tank. The system is primed, and the engine is started and run to make sure everything is operating perfectly before you get back on your way.
This methodical approach is the only way to be certain that every drop of damaging petrol or corrosive AdBlue crystal has been removed, giving you complete peace of mind.
Getting Rid of Contaminated Fuel the Right Way

Okay, so you've managed to clean out the fuel tank and the car's running again. Great job. But the work isn't quite finished. You’re now left with a container of contaminated fuel, some fuel-soaked rags, and maybe other waste. Tipping this stuff down the drain or just chucking it in the bin isn't an option—it's illegal and does serious environmental harm.
Getting this part wrong can lead to contaminated groundwater and soil, not to mention the risk of a hefty fine. So, let’s talk about how to handle it properly.
Finding Your Local Hazardous Waste Point
Every local council in the UK provides a way for residents to dispose of hazardous household waste, including old fuel. Your go-to resource is your local council's website. For anyone in our area, a quick search on the Suffolk County Council site will point you to the right Household Waste Recycling Centre (HWRC).
It’s crucial to realise that not all recycling centres can take liquid fuel. You need to find one that's specifically licensed for it.
Check the council website first. It will list which locations accept hazardous materials like petrol and diesel.
Don't be afraid to call ahead. A quick phone call can confirm they'll take it and save you a wasted trip.
Be aware of limits. Most centres have a limit on how much they'll accept from a resident at one time, usually around 20-25 litres.
A quick tip from experience: Always transport the contaminated fuel in the same approved, sealed jerry cans you used to drain it. Don't even think about using old milk cartons or flimsy plastic bottles—they can easily leak or even dissolve.
Transporting and Disposing of Everything Safely
When you’re ready to go, make sure the containers are sitting upright and are secured in your boot so they can’t fall over. It’s also a good idea to crack a window for ventilation.
Once you get to the recycling centre, just let a member of staff know what you’ve brought. They’ll show you exactly where to go and what to do.
Following these rules really does make a difference. The UK has tight regulations, like the Control of Pollution (Oil Storage) (England) Regulations 2001, which have helped slash environmental incidents. In fact, these measures contributed to a 60% decrease in oil pollution incidents from storage tanks between 2000 and 2015. It just shows that proper disposal works. You can read more about the legal compliance of diesel storage and its benefits on northerntankstore.co.uk.
Finally, don't forget about the other bits and pieces. Any cloths, gloves, or protective gear that’s covered in fuel also counts as hazardous waste. Seal them up in a tough, leak-proof bag and hand them over to the staff at the centre. Taking this final step means you've done the job properly from start to finish, protecting your car and the local environment.
Knowing When to Call a Professional Fuel Drain Service
There’s a certain pride in fixing things yourself, but when it comes to your car’s fuel system, some jobs are best left to those who do it day in, day out. Knowing when to step back and call in an expert can save you a mountain of stress, prevent catastrophic engine damage, and make sure everything is handled safely.
The single biggest factor is whether you’ve turned the key. If you've started or driven the car with the wrong fuel, the contamination is no longer just in the tank. It’s been pulled into a sensitive network of high-pressure pumps, fuel lines, and injectors. At that point, simply draining the tank won't cut it—the entire system needs a professional flush to prevent long-term harm.
Is This Job Too Complex for DIY?
Modern cars, particularly diesels with common rail systems or petrol cars with direct injection, have incredibly complex fuel setups. Getting to the tank isn't always straightforward and often requires special tools. One slip could damage delicate sensors or fuel pump wiring. If you look under the back seat and are met with a spaghetti junction of pipes and connectors you don’t recognise, that's your cue to call a pro.
You also have to think about the environment you're working in. Do you have a safe, open-air space with no ignition sources nearby? Do you have the right safety gear and, crucially, a legally compliant way to store and dispose of the contaminated fuel? If there’s any hesitation, a mobile service is the far safer and more responsible option.
A professional fuel drain might seem like an expense, but it’s almost always a fraction of the cost of replacing a fuel pump or injectors damaged during a DIY attempt. Think of it as an investment in getting back on the road without a hitch.
What Does a Mobile Fuel Drain Service Actually Do?
When you call a specialist like Misfuelled Car Fixer here in Suffolk, a fully equipped van with a trained technician comes to you, wherever you are. The whole process is usually sorted in about 60-90 minutes.
Here’s a quick rundown of what we handle on-site:
We safely drain 100% of the contaminated fuel from your tank using certified, anti-static equipment.
The fuel lines, filter housing, and fuel rail are then flushed clean of any lingering contaminants.
All the hazardous waste is contained and will be disposed of according to strict environmental regulations.
We’ll add a shot of fresh, correct fuel to get you going and make sure the engine starts and runs perfectly before we leave.
If you find yourself stuck, our emergency guide on finding a fuel drain near you offers some immediate help. When you weigh the risks of a DIY job against the speed, safety, and expertise of a professional, the choice becomes pretty clear.
A Few Lingering Questions About Fuel Tank Cleaning
It’s completely normal to have a few questions buzzing around your head before you dive into a job like this. When it comes to something as crucial as your car's fuel system, you want to be 100% confident. Let's tackle some of the most common things people ask us.
Can I Just Tip an Additive in and Call It a Day?
We get this one a lot. Fuel system cleaners are brilliant for routine upkeep, helping to shift minor build-up in your fuel lines and injectors. But they just aren't a match for serious contamination.
If you’ve got thick sludge, rust flakes, or a significant amount of water sitting at the bottom of your tank, an additive simply won’t dissolve it. All that gunk will just get sloshed around and eventually clog your fuel filter or worse. Think of it this way: an additive is like a daily mouthwash, but a full tank drain is the deep-clean you get from a dental hygienist. They serve very different purposes.
How Often Should I Be Cleaning My Fuel Tank?
For the average modern car, cleaning the fuel tank isn't a regular maintenance item. You really only need to worry about it if something has gone wrong – you've picked up some dodgy fuel, accidentally put the wrong fuel in, or the car has been sat unused for a very long time.
Classic cars or specialist vehicles might benefit from a preventative clean every few years, but for most drivers, it's a reactive job.
The best advice is to listen to your car. If it's running rough, stuttering, or losing power and you've checked the usual suspects, it’s time to consider what's going on inside the tank.
Could I Damage My Car by Trying This Myself?
Absolutely. While it’s a manageable job for some, there are real risks if you're not careful. The biggest pitfalls we see are people accidentally introducing new debris (like fibres from a cloth), breaking the delicate fuel pump or sender unit while removing it, or not flushing the fuel lines properly after a misfuel.
Even worse, using the wrong tools could create a spark near fuel vapours, or reassembling things incorrectly could lead to a dangerous fuel leak. If you have the slightest doubt, calling in a professional is always the smartest and safest choice for both you and your vehicle.
If you're dealing with a contaminated tank or have put petrol in your diesel car (or vice versa), don't take a chance. The team at Misfuelled Car Fixer provides a fast, safe, and professional fuel drain service right across Suffolk. Get immediate help by visiting our website.


